From Demo to Done: What to Expect During a Custom Shower Installation
During a custom shower installation, you’ll start with careful preparation, including setting a budget and selecting durable materials. Next, the old shower gets demolished, followed by necessary plumbing and electrical modifications to fit your new design. As you install the new shower, pay attention to alignment and aesthetics. Finally, you’ll wrap things up with final touches and a thorough clean-up. Each step builds toward your dream shower, and there’s more to investigate about making it happen.
Key Takeaways
- Begin by setting a budget and selecting durable, eco-friendly materials for your custom shower installation.
- Carefully demolish the old shower, ensuring safety and organized disposal of debris.
- Modify plumbing and electrical systems to align with the new shower design and meet local safety codes.
- Install the new shower by following the design closely, ensuring proper alignment of plumbing and tiles.
- Finish with a thorough inspection for leaks, cleanup, and any necessary touch-ups on caulking and grout lines.
Preparing for the Installation
Before diving into your custom shower installation, you’ll want to make certain you’ve covered all your bases. Start by setting a budget that aligns with your vision and wallet. Knowing how much you’re willing to spend helps you make informed choices later on. Next, focus on choosing materials that not only fit your style but likewise cater to durability and maintenance. Consider options like tiles, glass, and fixtures that will stand the test of time while enhancing the aesthetic of your space. Don’t forget to think about eco-friendly choices if sustainability matters to you. By carefully planning these aspects, you’ll guarantee a smoother installation process, allowing you to create a beautiful shower that serves both you and your guests for years to come. Additionally, incorporating Schluter waterproofing products can significantly reduce the risk of moisture buildup and mold in your new shower.
Demolition of the Old Shower
Once you’ve gathered your materials and accepted your vision, it’s time to tackle the demolition of the old shower. Begin with shower removal by carefully disconnecting any plumbing fixtures, ensuring you’ve turned off the water supply first. Use a pry bar to detach tiles or panels, and be mindful of potential hazards like sharp edges. As you strip away the old materials, make sure to collect all debris for disposal. Having a designated area for debris disposal can streamline the process and keep your workspace organized. Remember, safety is key—wear goggles and gloves to protect yourself. This step not only clears the way for your new installation but likewise sets the stage for a fresh, functional space that serves your needs. Additionally, consider hiring a professional for custom installations to ensure quality and longevity in your new shower setup.
Plumbing and Electrical Modifications
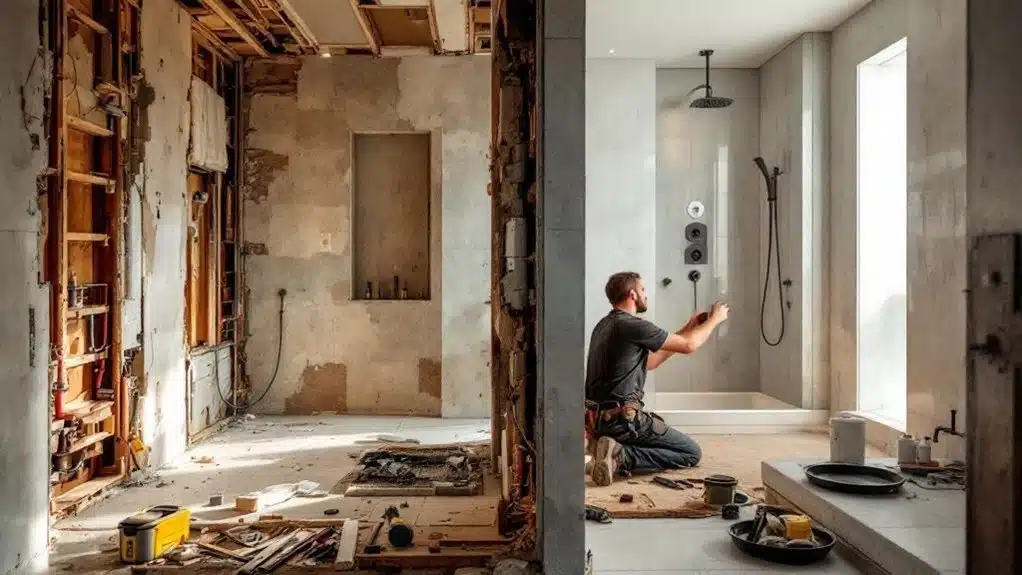
With the old shower gone, it’s time to focus on the plumbing and electrical modifications that will support your new installation. First, you might need pipe relocation to guarantee your water supply and drainage align perfectly with your new shower’s design. This step is critical for ideal water flow and to prevent leaks down the line.
Next, consider wiring upgrades. If your new shower includes features like lighting or a heated floor, updating your electrical system is fundamental for safety and functionality. Verify that your electrical work meets local codes and can handle the added load. These modifications may seem intimidating, but they’re important for creating a beautiful and efficient shower space that serves you and your family for years to come. Additionally, working with a flooring specialist ensures that all installations adhere to industry standards for quality and safety.
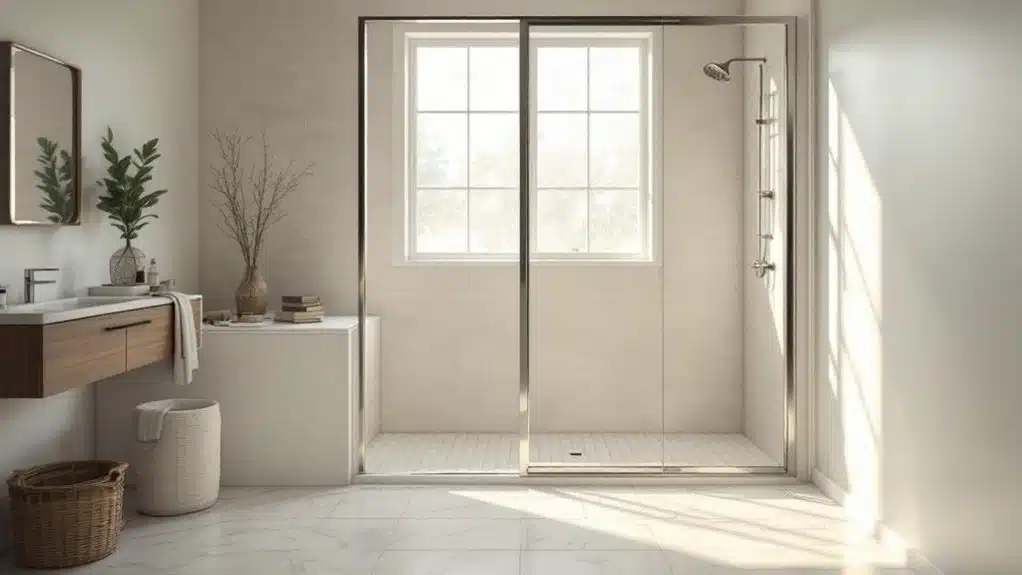
Installing the New Shower
It’s time to plunge into installing your new shower, and this is where the thrill really begins! Start by carefully following your chosen shower design; it sets the foundation for an enjoyable space. You’ll want to guarantee all plumbing aligns perfectly with the new fixtures you’ve selected.
As you move forward, tile selection becomes vital. Choose tiles that not only reflect your personal style but additionally offer durability and slip resistance. When laying the tiles, make certain to keep the grout lines straight for a polished look. Don’t forget to check for proper sealing around the edges to prevent leaks.
With each step, you’re creating a beautiful, functional shower that will serve you and your guests for years to come!
Final Touches and Clean-Up
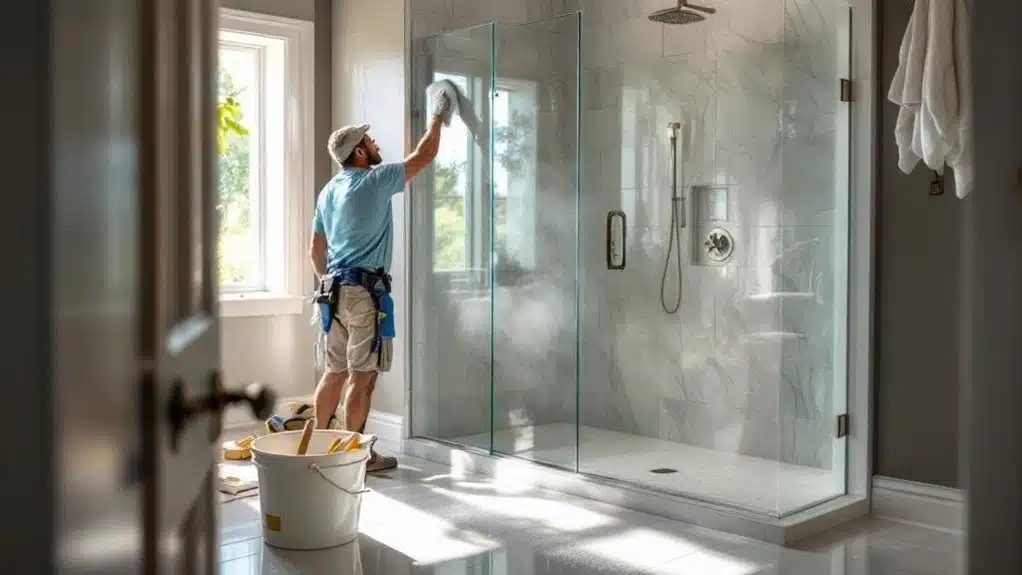
As you wrap up your shower installation, don’t underestimate the importance of final touches and clean-up. These finishing details can make a significant difference in both aesthetics and functionality. Start by ensuring all fixtures are securely installed and functioning properly. Check for any leaks and adjust as necessary.
Next, focus on site cleanup. Remove any debris, tools, and leftover materials to create a safe and inviting space. Wipe down surfaces to eliminate dust and fingerprints, ensuring everything sparkles. Don’t forget to inspect caulking and grout lines for any needed touch-ups. Once you’ve completed these steps, take a moment to appreciate your hard work. A clean, polished shower not only improves your home but likewise serves your family and guests well.
Conclusion
As you wrap up your custom shower installation, think of it like completing a puzzle. Each step—demolition, plumbing, and installation—fits together to create your perfect oasis. Just like the satisfaction of placing the final piece, seeing your new shower come to life brings a sense of accomplishment. Remember, the journey may be messy and challenging, but once it’s done, you’ll enjoy the revitalizing reward of your hard work every day. Enjoy your new space!