Staircase Carpet Installation: What to Expect From Start to Finish
Staircase carpet installation begins with selecting durable materials like nylon or polyester in loop pile construction, followed by choosing 3/8″ to 7/16″ padding with 6-8 lbs/cu ft density. You’ll measure each tread (10-11″), riser (7-8″), and width, adding 10% waste factor. Professional installers prepare surfaces, position tackless strips, and secure carpet using waterfall, cap-and-band, or Hollywood wrap methods. Standard installations take 4-8 hours depending on configuration. The extensive guide below covers special configurations, securing techniques, and long-term maintenance protocols you’ll need to understand.
Key Takeaways
- Choose durable carpet materials like nylon with medium to high-density pile and select appropriate padding between 3/8″ to 7/16″ thickness.
- Measure tread depth, riser height, and step width, then calculate square footage adding 10% waste factor for adjustments.
- Prepare stairs by removing debris, old materials, securing loose boards, and installing tackless strips along each step’s edges.
- Installation takes 4-8 hours for standard staircases, with complex configurations like spiral or L-shaped requiring additional time.
- Maintain carpets through weekly vacuuming, immediate stain treatment, quarterly inspections, and moisture control to prevent mold growth.
Choosing the Right Carpet Material and Style for Your Staircase
When selecting carpet for staircase installation, you’ll need to evaluate three critical factors: fiber composition, pile density, and wear resistance ratings. Nylon offers superior durability for high-traffic stairs, while polyester provides budget-friendly softness. Choose medium to high-density piles (40+ ounces) to withstand constant foot pressure.
Consider your clients’ lifestyle demands when recommending carpet color and carpet patterns. Darker hues and multi-tonal patterns effectively conceal wear and soil between cleanings. Loop pile construction resists crushing better than cut pile on stair treads.
Verify the carpet’s coefficient of friction meets safety standards—typically 0.5 or higher. Select products with stain-resistant treatments and warranties covering heavy-use applications. Match the carpet’s backing system to your planned installation method for ideal performance. For households with pets, nylon carpets provide excellent stain resistance and durability to handle the additional wear from active animals using the stairs.
Selecting Appropriate Padding and Underlayment
You’ll need to select padding that matches your staircase’s specific requirements, focusing on two critical specifications: thickness ranging from 3/8″ to 7/16″ and density between 6-8 pounds per cubic foot for ideal performance and safety. Don’t exceed 7/16″ thickness, as excessive padding creates an unstable walking surface and accelerates carpet wear on stair nosings. If your stairs are in a basement or ground-level location, you’ll want to install a moisture barrier beneath the padding to prevent mold growth and material degradation. Once installed, establish a regular cleaning routine with proper vacuuming techniques using appropriate attachments to maintain your staircase carpet’s appearance and extend its longevity.
Padding Thickness and Density
Carpet padding for staircases requires precise specifications that differ substantially from standard residential installations. You’ll need to select padding types based on performance characteristics that guarantee client safety and longevity. The density impact directly affects how well your installation withstands daily foot traffic and prevents premature wear.
| Padding Type | Recommended Density | Thickness Range |
|---|---|---|
| Rebond Rubber | 8-10 lbs/cu ft | 3/8″ – 7/16″ |
| Prime Urethane | 6-8 lbs/cu ft | 1/4″ – 3/8″ |
| Frothed Foam | 12-16 lbs/cu ft | 1/4″ – 5/16″ |
You’ll achieve ideal results by selecting higher-density options for high-traffic staircases. Thinner padding provides better stability on stair treads, reducing trip hazards while maintaining adequate cushioning for those you’re serving. Professional flooring companies emphasize that selecting appropriate padding and underlayment is crucial for ensuring the longevity and safety of your staircase carpet installation.
Moisture Barrier Installation Needs
Beyond density and thickness considerations, staircase installations in basements, entryways, or climate-controlled environments demand moisture barrier protection beneath your padding layer. You’ll need to assess your specific installation location for humidity levels and potential water vapor transmission through concrete subfloors.
Professional installers typically recommend polyethylene sheeting (minimum 6-mil thickness) for moisture control in vulnerable areas. This barrier prevents moisture migration that compromises adhesive bonds and promotes mold growth. You’re protecting both your client’s investment and ensuring carpet longevity through proper moisture management.
Installation requires overlapping seams by six inches and sealing with moisture-resistant tape. For concrete stairs in basements or ground-level entries, you’ll want to conduct a calcium chloride test beforehand. This measurement determines if moisture levels exceed manufacturer specifications, guiding your barrier selection. In humid climates, moisture barriers reduce the risk of mold growth that can damage both carpet and underlying structures.
Measuring Your Staircase and Calculating Carpet Requirements
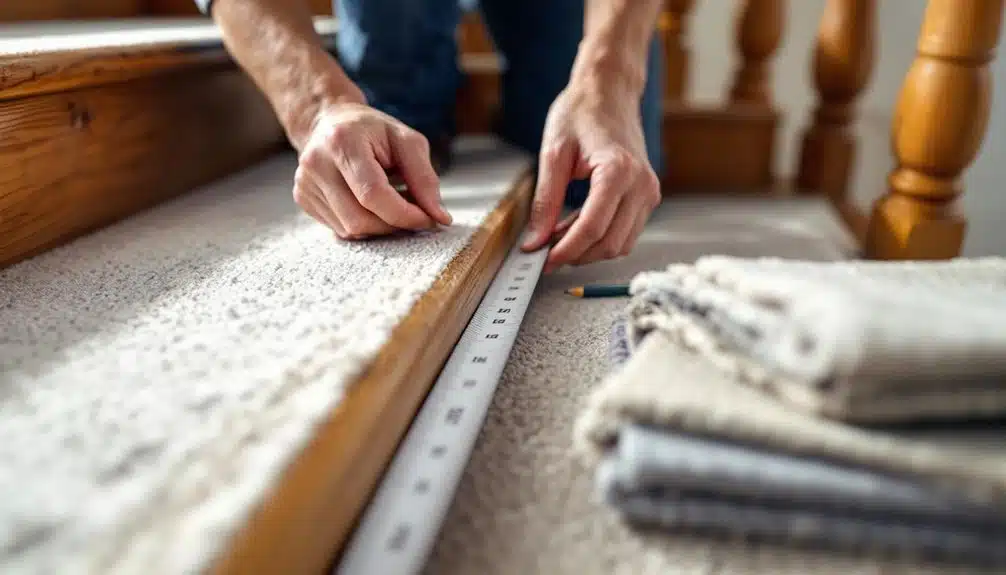
Accurate measurements form the foundation of any successful staircase carpet installation, directly impacting material costs and project outcomes. You’ll need to capture precise staircase dimensions to guarantee your clients receive ideal results without material waste.
Begin with these crucial measurements:
- Tread depth: Measure from nosing to riser, typically 10-11 inches
- Riser height: Measure vertical distance between steps, usually 7-8 inches
- Step width: Record the horizontal span across each tread
- Total step count: Document all risers requiring coverage
- Landing areas: Calculate square footage of platforms and connections
For carpet calculations, multiply (tread depth + riser height) by step width, then multiply by total steps. Add 10% waste factor for pattern matching and installation adjustments. When selecting materials, consider carpets with stain-resistant properties that offer excellent value while maintaining durability in high-traffic stairway areas. This systematic approach guarantees accurate material ordering and professional installation outcomes.
Preparing Your Staircase Before Installation Day
| Preparation Task | Critical Requirements |
|---|---|
| Cleaning preparation | Remove debris, vacuum thoroughly, eliminate adhesive residue |
| Stair safety inspection | Test handrails, secure loose treads, verify structural integrity |
| Material removal | Extract all staples, tack strips, nails from previous installation |
| Surface evaluation | Document cracks, splits, or moisture damage requiring repair |
Complete these tasks 48 hours before installation. Your installer will verify compliance and recommend additional corrective measures if necessary. Proper preparation guarantees ideal adhesion and extends carpet lifespan.
Understanding Professional Installation Techniques and Methods
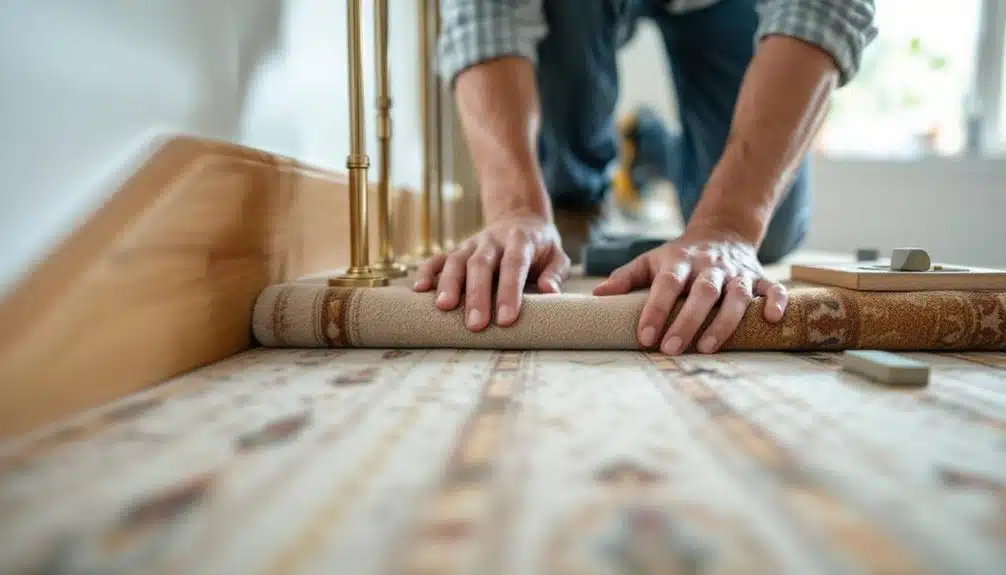
When professional installers approach your staircase, they’ll select from three primary installation methods: waterfall, cap-and-band, or Hollywood (wrap) technique. Each method serves different aesthetic and functional requirements. Understanding these professional methods helps you make well-informed choices that best serve your household’s needs.
The installation techniques involve:
- Waterfall method – Carpet flows continuously from tread to tread, creating seamless shifts
- Cap-and-band technique – Separate pieces cover treads and risers independently for distinct definition
- Hollywood wrap – Carpet wraps around each tread’s nosing for durability
- Tackless strip placement – Secures carpet at strategic anchor points
- Padding configuration – Cushioning positioned for ideal comfort and longevity
Your installer’s expertise guarantees proper tension distribution, preventing premature wear and maintaining safety standards throughout your staircase.
The Step-by-Step Installation Process Explained
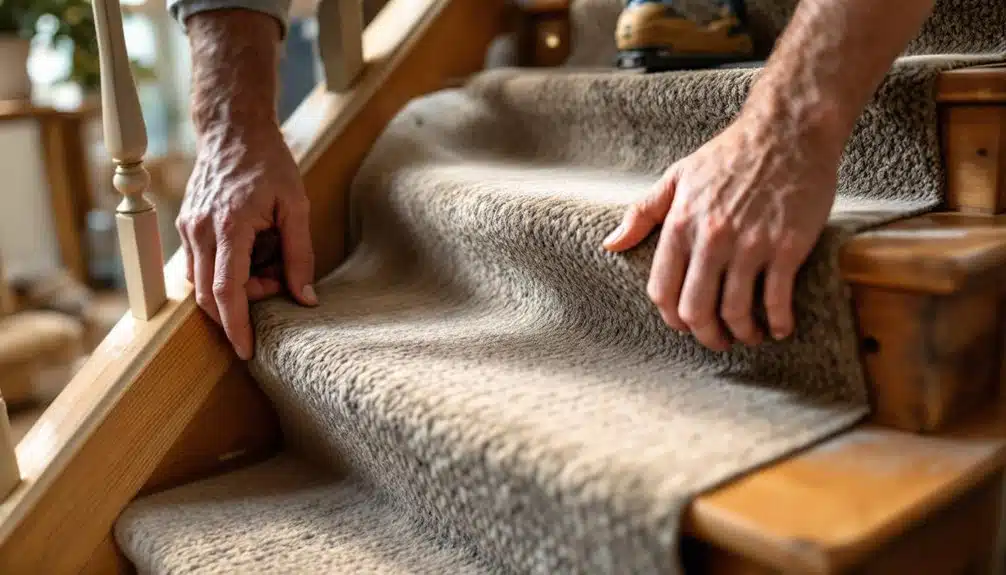
Professional staircase carpet installation follows seven distinct phases that transform your bare stairs into finished, safe surfaces. First, installers measure each tread and riser precisely, accounting for installation challenges like irregular dimensions. Second, they prepare surfaces by removing debris and securing loose boards. Third, tackless strips get positioned along each step’s edges. Fourth, padding installation provides cushioning and longevity. Fifth, carpet fitting begins at the bottom step, stretching material tightly across each tread. Sixth, power stretchers guarantee proper tension while addressing installation challenges at corners and landings. Finally, trimming and tucking complete the carpet aesthetics, creating clean edges along walls and risers. Throughout this process, you’ll notice installers maintaining consistent pile direction and pattern alignment, guaranteeing your clients receive professional results that improve both safety and visual appeal.
Securing Methods: Tack Strips, Staples, and Adhesives
Since each securing method offers distinct advantages for different staircase conditions, you’ll need to select between tack strips, staples, and adhesives based on your project’s specific requirements.
Tack strip installation provides superior carpet tension and longevity for high-traffic residential installations. Position strips ⅜-inch from the nosing and riser intersection.
Consider these crucial securing methods:
- Tackless strips – Ideal for woven carpets requiring professional stretch-in technique
- Power staples – Best for directly attaching carpet to wooden treads and risers
- Pressure-sensitive adhesives – Perfect for low-pile commercial applications
- Double-sided carpet tape – Suitable for temporary installations or rental properties
- Contact cement – Provides permanent bonding for rubber-backed carpeting
Select adhesive options matching your carpet backing type. Water-based formulas serve eco-conscious clients, while solvent-based products deliver maximum hold for demanding commercial environments.
Handling Corners, Landings, and Special Configurations
Landing solutions require strategic seam placement to minimize visibility while maintaining durability in high-traffic zones. Here’s what you’ll encounter:
| Configuration | Installation Approach |
|---|---|
| 90-degree corners | Relief cuts with tucked edges |
| L-shaped landings | Directional seaming parallel to traffic |
| Winder treads | Pie-piece templating with center point |
| Curved staircases | Flexible backing with progressive stretching |
Professional installers position seams perpendicular to foot traffic, maximizing longevity while serving your household’s long-term needs.
Timeline and Duration of the Installation Project
You’ll need to allocate between 4-8 hours for a standard straight staircase installation, though this timeframe varies considerably based on specific project variables. Several critical factors influence your project duration, including staircase configuration complexity, carpet material characteristics, substrate preparation requirements, and your installer’s skill level. Understanding these time parameters allows you to schedule appropriately and coordinate with your contractor to minimize household disruption during the installation process.
Average Installation Time Frames
Most staircase carpet installations require 4-8 hours to complete, though this timeline varies considerably based on your staircase configuration and chosen installation method. Understanding these installation time parameters helps you plan effectively and maximize project efficiency for your clients.
Key factors affecting installation duration include:
- Straight staircases: 3-4 hours for standard 13-step configurations
- L-shaped or U-shaped staircases: 5-7 hours because of landing shifts and directional changes
- Spiral staircases: 6-10 hours requiring precise measurements and custom cuts
- Carpet padding installation: Add 1-2 hours to overall timeline
- Waterfall versus wrapped methods: Wrapped installations increase time by 30-40%
Professional installers complete preparation, fitting, stretching, and securing processes systematically. You’ll need additional time for furniture removal, substrate repairs, or custom runner installations with exposed edges.
Factors Affecting Project Duration
While standard installation times provide useful benchmarks, several critical variables can extend or reduce your project timeline greatly. Staircase configuration markedly impacts duration—curved or winding stairs require more precise measuring and cutting than straight runs. Pre-existing flooring removal adds 2-4 hours to your project. Installation challenges like damaged subfloors, uneven treads, or moisture issues demand remediation before carpet installation proceeds. Your carpet selection matters too; patterned carpets requiring precise alignment extend installation time by 30-50%. Preparation work, including surface cleaning and tack strip installation on previously uncarpeted stairs, introduces project delays. Installer experience level directly correlates with efficiency—certified professionals complete complex configurations faster while maintaining quality standards. Weather conditions affecting adhesive curing times and material acclimatization periods likewise influence your final timeline.
Post-Installation Care and Maintenance Best Practices
After completing your staircase carpet installation, implement a structured maintenance protocol to maximize the lifespan and appearance of your investment. Regular cleaning prevents fiber degradation and maintains aesthetic quality for those you serve.
Essential maintenance practices include:
- Vacuum weekly using proper attachments to remove debris from treads and risers
- Address stain removal immediately with manufacturer-approved solutions to prevent permanent damage
- Conduct routine inspections quarterly to identify wear patterns and fiber compression
- Perform wear assessment on high-traffic areas, documenting changes for future replacement planning
- Maintain moisture control through proper ventilation, preventing mold and mildew development
For households with animals, establish pet care protocols including paw cleaning and nail trimming. Document all maintenance activities to guarantee consistent care standards.
Conclusion
Your staircase transformation balances artistry against precision engineering. You’ve navigated material selection, measured tread depths and riser heights, and witnessed professional installers marry tackless strips to wooden substrates. Where once bare wood echoed footsteps, plush pile fibers now dampen sound. The contrast between preparation’s meticulous calculations and installation’s physical execution reveals carpet fitting’s dual nature. You’ll maintain this investment through regular vacuuming, addressing spills immediately with pH-neutral solutions, and scheduling professional steam cleaning annually. Your staircase now merges safety with aesthetic appeal.