How to Prepare Your Home Before Flooring Installation Day
Most homeowners don’t realize that moisture fluctuations during installation can permanently warp new flooring materials. You’ll need to take specific steps before your installation crew arrives to prevent costly damage and guarantee ideal results. From subfloor assessment to climate control, proper preparation makes the difference between a flawless finish and ongoing problems that’ll require expensive repairs down the line.
Key Takeaways
- Inspect your subfloor for damage, rot, and moisture issues using a moisture meter before installation begins.
- Clear all furniture, decorations, and personal items from the installation area for unobstructed worker access.
- Protect surrounding surfaces with wall padding, baseboard covers, and plastic sheeting to prevent damage.
- Stabilize indoor temperature between 65-85°F and maintain 30-50% humidity using HVAC and dehumidifiers.
- Create clear access routes by removing obstacles from doorways and hallways for efficient material transport.
Catch Subfloor Problems Before Installation Day
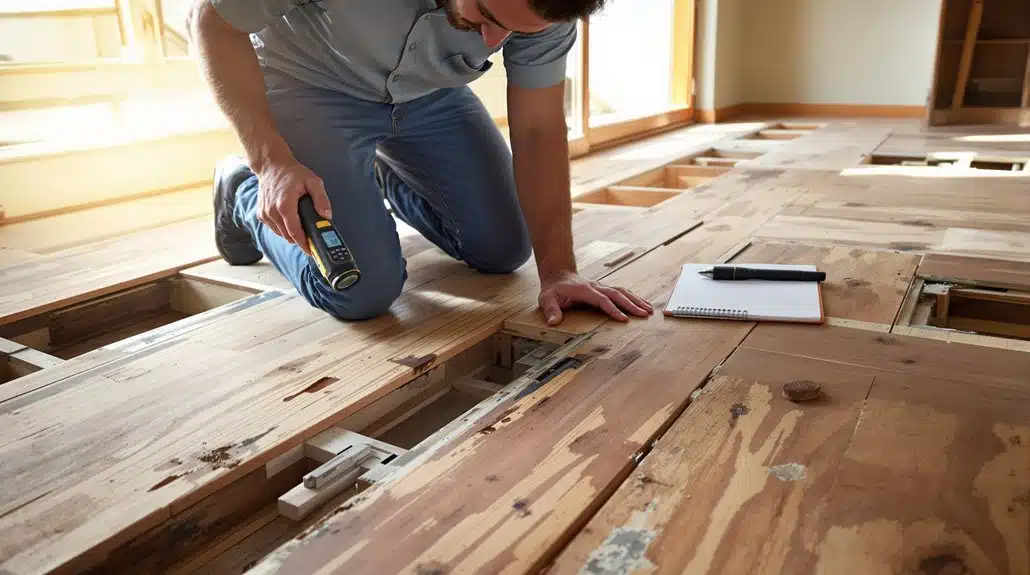
Before your new flooring arrives, you’ll want to inspect your subfloor for damage that could compromise the installation. Check for rot, soft spots, and structural issues that’ll affect your flooring’s longevity.
Start with subfloor inspection tips: examine joists for warping or decay, and look for gaps between boards. Press suspected weak areas with a screwdriver—if it penetrates easily, you’ve found damage requiring repair.
Incorporate moisture assessment techniques into your inspection routine. Use a moisture meter to identify heightened humidity levels that could cause buckling or mold growth. Test multiple areas, particularly near walls and previous water-damage zones.
Address any problems immediately. Your contractor can’t install flooring over compromised subfloors. Pay special attention to areas where warping or buckling has occurred, as these indicate underlying moisture or structural problems that must be resolved. Taking time now prevents expensive callbacks and guarantees your new flooring performs as intended.
Clear Furniture and Personal Items From Your Space
You’ll need to completely empty the installation area of all furniture and personal items before your contractor arrives. This preparation guarantees unobstructed access to every square foot of your flooring space.
Start by planning your furniture storage strategically. Move larger pieces to another room or rent a temporary storage unit if necessary. Document your room layout beforehand to simplify reinstallation later.
For personal item organization, remove decorations, electronics, and smaller belongings from shelves and surfaces. This protects your valuables from dust and potential damage during installation.
Clear closets, cabinets, and baseboards entirely. Your contractor needs full perimeter access to properly install flooring connections and trim work.
Many professional installers offer furniture moving services to protect your belongings and ensure the space is properly prepared for installation.
Protect Walls, Baseboards, and Doorways

With your space now cleared, protecting the surrounding surfaces becomes the next priority. You’ll want to install wall padding along the perimeter to shield walls from equipment and material impacts. Apply baseboard covers to prevent scuffs and damage to these vulnerable lower surfaces. Door frame protection is crucial—use cardboard or plastic sheeting to guard against dings and debris contact.
Install corner guards at inside and outside corners where flooring installers frequently move equipment. These guards absorb impact that would otherwise mar your walls and trim work.
Don’t overlook doorways connecting to other rooms. Seal these openings with plastic sheeting and tape to contain dust and debris while maintaining work zone boundaries.
These protective measures save you significant repair costs and preserve your home’s existing surfaces throughout the installation process. Creating a designated work area for installers helps minimize disruptions to the rest of your home during the flooring project.
Set the Right Climate for Your New Floors
Most flooring materials are sensitive to temperature and humidity fluctuations, making environmental control essential before installation begins. You’ll need to stabilize your home’s climate for at least 48 hours before the installers arrive.
Maintain temperature regulation between 65-85°F throughout your home. Extreme temperature variations cause materials to expand or contract, compromising installation quality and longevity.
Humidity control is similarly important. Keep indoor humidity between 30-50% relative humidity. Use dehumidifiers in damp areas and humidifiers in dry climates to achieve this balance. Improper humidity levels can lead to warping, buckling, or gaps in your new flooring.
Verify your HVAC system functions properly and adjust it accordingly. Open windows sparingly to avoid introducing outdoor air that disrupts your climate settings. For hardwood installations specifically, consistent humidity management is essential for preventing expansion and shrinkage that can compromise both floor integrity and aesthetics. This preparation directly impacts your flooring’s performance and durability after installation.
Create Clear Access Routes for Installation Crews

You’ll need to remove furniture and obstacles from the installation area to give crews adequate workspace and prevent damage to your belongings. Clear all doorways and hallways that the installation team will traverse, ensuring they can transport materials and equipment without obstruction or delay. Protect your walls and baseboards with cardboard or plastic sheeting, as foot traffic and equipment movement during installation can cause scuffs and dings.
Remove Furniture and Obstacles
Clear the installation area completely before crews arrive to guarantee efficient workflow and prevent damage to your belongings. You’ll want to remove all furniture from the rooms where installation will occur. Don’t simply push items to the side—relocate them to another area of your home or arrange temporary furniture storage elsewhere. This prevents accidental damage and gives crews unobstructed workspace.
Address obstacle removal systematically. Take out baseboards if your installer hasn’t specified otherwise, and remove doors from their hinges. Clear vents, registers, and threshold changes. Disconnect and relocate any floor-mounted appliances or fixtures within the installation zone.
You should likewise protect your walls and door frames with cardboard or protective coverings. This preparation guarantees installation crews can work safely and efficiently without maneuvering around obstacles.
Clear Doorways and Hallways
Beyond clearing individual rooms, installation crews need unobstructed pathways throughout your home to transport materials and equipment efficiently. You’ll want to measure your doorway dimensions to verify crews can maneuver large flooring planks and machinery without difficulty. Standard doorways are typically 32-36 inches wide, but you should confirm yours beforehand.
Next, assess your hallway spacing by removing any runners, side tables, or decorative items that narrow passages. You’re creating temporary access routes that’ll remain clear until installation concludes. Make sure stairwells are completely empty if crews need to reach upper floors. Check for low-hanging fixtures, ceiling fans, or light fixtures that might obstruct equipment movement.
Consider protecting doorframes and walls with cardboard or protective film. You’re facilitating smooth workflow while safeguarding your home’s structural elements during the installation process.
Protect Walls and Baseboards
Since installation crews transport heavy materials and equipment through your home, walls and baseboards face significant damage risk from impacts, scratches, and scuffs. You’ll want to take preventive measures to protect these surfaces.
Cover wall coverings with cardboard or plastic sheeting along primary pathways where installers will move materials. Secure the protective barriers at corners and intersections where equipment traffic concentrates. For baseboard materials, consider temporary plywood guards at floor level, particularly near tight passages and doorframes.
Remove wall hangings, mirrors, and shelving within the installation zone. These obstacles create hazards for crew members maneuvering large flooring materials while increasing wall damage potential.
Position furniture away from work areas entirely. By establishing these protective boundaries beforehand, you’ll guarantee your walls and baseboards remain undamaged throughout the installation process.
Notify Utilities and Prepare for Service Disruptions
You’ll need to contact your service providers—electricity, water, and gas companies—well in advance to inform them of the installation dates and potential access needs. Plan alternative water access for your household, such as arranging bottled water or identifying a neighbor’s tap, in case the installation disrupts your main supply. Arrange temporary power solutions like generators or portable batteries to maintain crucial services if your electrical supply gets interrupted during the flooring work.
Contact Your Service Providers
Before installation begins, notify your utility companies and prepare for potential service disruptions. Contact your gas, electric, and water providers to confirm appointments and discuss timelines for any necessary work. Inform them about your flooring project so they’re aware of increased activity at your property.
Request that technicians schedule visits before or after installation days to minimize conflicts. Ask about potential service interruptions and how long they might last. Provide your contact information and make sure someone will be home during scheduled visits.
Document all confirmation numbers and appointment details. If you have a smart meter or security system, alert those providers as well. This proactive communication prevents costly delays and guarantees your installation proceeds smoothly without utility complications.
Plan Alternative Water Access
While coordinating with utility companies sets the groundwork for uninterrupted service, water access deserves particular attention during flooring installation. You’ll want to identify alternative water sources before crews arrive, particularly for kitchens and bathrooms where continuous access is crucial.
Discuss plumbing adjustments with your contractor to determine which areas will be inaccessible and for how long. If your home relies on water filtration systems, arrange for temporary supplies or portable filtration units to maintain your water quality standards during the installation period.
Consider filling bathtubs or containers with water beforehand as backup reserves. You should likewise notify household members and any caregivers about water access limitations. This proactive planning guarantees minimal disruption to your daily routines and prevents unnecessary complications during the flooring project.
Arrange Temporary Power Solutions
Electrical disruptions during flooring installation can greatly impact your home’s functionality, making advance coordination with your utility company vital. You’ll need to arrange temporary power solutions that keep important systems operational throughout the project.
Consider these practical options:
- Identify alternative power sources outside the installation zone for refrigeration and climate control
- Invest in heavy-duty extension cords rated for your equipment’s electrical demands
- Evaluate generator options that provide sufficient wattage without overloading circuits
- Deploy battery backups for critical devices like internet routers and security systems
Contact your utility provider at least two weeks beforehand to confirm service availability and schedule any necessary temporary connections. You’ll likewise want to test all backup systems before installation begins. This proactive approach prevents operational gaps and protects your home’s vital functions during the flooring work.
Complete Your Pre-Installation Checklist
As your installation date approaches, you’ll want to confirm that your home meets all the necessary requirements for a smooth flooring project. Review this checklist to verify you’re ready to serve your flooring contractor effectively.
| Checklist Item | Status |
|---|---|
| Clear all furniture from installation areas | ☐ |
| Remove baseboards and trim if required | ☐ |
| Verify subfloor condition and moisture levels | ☐ |
| Acclimate flooring materials per manufacturer specs | ☐ |
Your preparation directly impacts the installation timeline and quality of your new floors. Confirm that your contractor has confirmed delivery details for your flooring materials. Verify climate control settings—most installations require stable temperature and humidity. Guarantee accessible entry points for equipment and workers. Document existing damage with photos for reference. Double-check that power solutions are operational. Complete these steps systematically to eliminate delays and promote efficient installation execution.
Conclusion
You’ve laid the groundwork—your home’s foundation is now a blank canvas ready for transformation. By inspecting subfloors, clearing spaces, and protecting surfaces, you’re building the scaffolding for success. Climate control and clear pathways aren’t just logistics; they’re the guardrails ensuring your installation proceeds smoothly. You’ve fundamentally created a controlled environment where craftsmanship can flourish. Your preparation directly determines installation quality and timeline efficiency. You’re not just preparing a room; you’re architecting a seamless changeover to your new floors.