How to Tell If Your Subfloor Needs Repair Before New Flooring Installation
Before installing new flooring, you’ll want to walk every section of your subfloor, pressing firmly to detect soft spots, bounce, or deflection. Listen for squeaks, look for visible warping or sagging, and check for water stains, mold, or discoloration. Use a moisture meter to identify hidden moisture damage before it spreads. Catching these warning signs early protects your investment and prevents costly failures down the line — and there’s a lot more to uncover about each one.
Key Takeaways
- Squeaking sounds or soft spots underfoot indicate structural integrity issues requiring immediate assessment before any new flooring installation begins.
- Visible warping, sagging, or cupped panels suggest prolonged moisture exposure and potential structural compromise needing repair first.
- Water stains, discoloration, or mold growth signal advanced subfloor deterioration that will worsen beneath new flooring if unaddressed.
- Installing new flooring over damaged subfloors hides problems, accelerating decay and causing buckling, cracking, or soft spots later.
- Use a moisture meter, flashlight, and screwdriver to systematically inspect and document damage before purchasing replacement materials.
Why You Should Check Your Subfloor Before Installing New Flooring
Before installing new flooring, you’ll want to assess the condition of your subfloor—skipping this step can lead to costly failures down the line. A compromised subfloor undermines even the highest-quality flooring materials and most precise installation techniques. Moisture damage, rot, warping, and structural weakness all affect how well your new floor performs and how long it lasts.
Checking your subfloor first protects your clients’ investments and guarantees a durable, safe result. Different subfloor materials—plywood, OSB, or concrete—each present unique challenges that directly influence which installation techniques you’ll apply. Identifying problems before installation allows you to make targeted repairs, select appropriate materials, and execute the project correctly the first time. Maintaining proper humidity levels between 45% and 65% during and after installation prevents wood shrinkage and expansion that can compromise your subfloor and new flooring. A thorough subfloor assessment is foundational to professional, long-lasting flooring work.
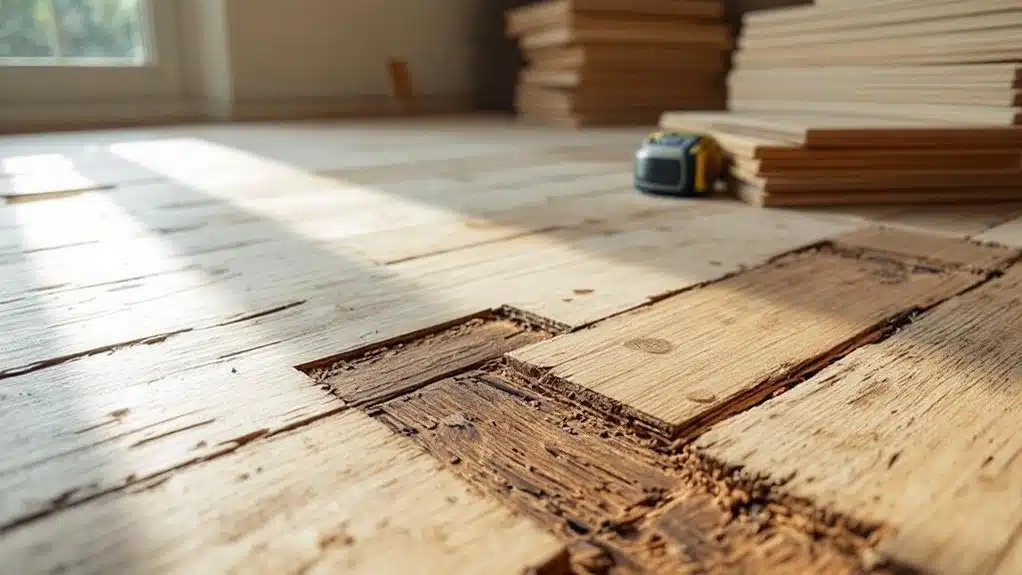
The Most Telling Signs Your Subfloor Is Damaged
When inspecting your subfloor, you’ll want to focus on three critical indicators of damage: squeaking and soft spots, visible warping or sagging, and water damage or staining. Walking across your floor and feeling for areas that give underfoot or emit squeaks can reveal compromised structural integrity in the subfloor panels beneath. You should additionally visually scan for any warping, sagging, or discoloration, as these signs often point to moisture infiltration or prolonged structural stress that demands immediate attention. If you notice warped or swollen floorboards, buckling, or peeling edges, this indicates water has infiltrated your subfloor and requires urgent repair before installing new flooring.
Squeaking And Soft Spots
Two of the most telling signs that your subfloor is damaged are squeaking and soft spots. Squeaky floors occur when subfloor panels separate from joists, creating friction as you walk across them. Don’t dismiss these sounds as minor annoyances — they’re structural warnings.
For soft spot detection, walk methodically across each room, applying firm pressure with your foot. Soft or spongy areas indicate moisture damage, rot, or delamination within the subfloor panels. These compromised sections won’t support new flooring materials properly, leading to premature failure of your installation.
Mark every squeaky zone and soft spot with painter’s tape before your flooring contractor arrives. This documentation helps them assess damage severity accurately, determine whether repairs or full replacement are necessary, and give you a precise project estimate. When you’re ready to move forward with repairs and new flooring, partnering with a professional flooring company ensures your subfloor issues are properly addressed before installation begins.
Visible Warping Or Sagging
While squeaking and soft spots require some detective work, visible warping or sagging leaves no room for interpretation — your subfloor is telling you it’s failing. When you notice floors buckling, dipping, or sloping, the subfloor materials beneath have likely absorbed excessive moisture or suffered structural compromise.
Walk the affected area carefully. If sections visibly bow under your weight, you’re dealing with deteriorated OSB or plywood that’s lost its structural integrity. These conditions don’t self-correct — they worsen under new flooring installation.
Effective repair techniques depend on damage severity. Minor warping may require targeted panel replacement, while widespread sagging often demands full subfloor section removal. Professional installation during your flooring replacement project ensures proper assessment and correction of underlying structural issues. Document every affected zone before your contractor arrives. Accurate assessment guarantees you select repair techniques that genuinely restore structural stability rather than simply masking the problem.
Water Damage And Stains
Water damage represents the most destructive force acting on subfloor systems, and its evidence often appears long before structural failure becomes visible. You’ll notice water stains as dark, discolored patches across the subfloor surface—critical indicators requiring immediate damage assessment. During inspection, use moisture meters and thermal imaging as vital inspection tools to detect hidden moisture retention beneath various flooring types.
Mold growth signals advanced deterioration, appearing as black, green, or white colonies that compromise both structural integrity and indoor air quality. Your repair techniques must address the moisture source before replacing damaged sections. Apply prevention tips including vapor barriers and proper ventilation to stop recurrence. Installing waterproof membranes beneath your new flooring creates an essential barrier that prevents water from reaching the subfloor and causing future damage. Thorough identification of water intrusion patterns guarantees your new flooring installation rests on a genuinely sound, moisture-free subfloor foundation.
Soft Spots, Squeaks, and Sags : What Each One Means
Three distinct warning signs — soft spots, squeaks, and sags — each tell a different story about what’s failing beneath your feet. Understanding soft spot causes and squeak solutions helps you diagnose problems accurately before installing new flooring. Addressing moisture damage promptly is critical, as proper humidity control between 45% and 65% can prevent the subfloor deterioration that leads to these warning signs in the first place.
| Warning Sign | What It Indicates |
|---|---|
| Soft Spot | Moisture-damaged or rotted subfloor panels |
| Squeak | Loose subfloor rubbing against joists or fasteners |
| Sag | Structural joist failure or excessive load damage |
| Multiple Signs Together | Widespread subfloor deterioration requiring full replacement |
When you walk the floor systematically, pressing firmly in grid-like patterns, you’ll locate compromised areas quickly. Squeaks often respond to targeted screw fastening, while soft spots demand panel replacement. Sags signal deeper structural concerns requiring a professional assessment before you proceed with any new flooring installation.
How to Inspect Your Subfloor: What to Look, Feel, and Listen For
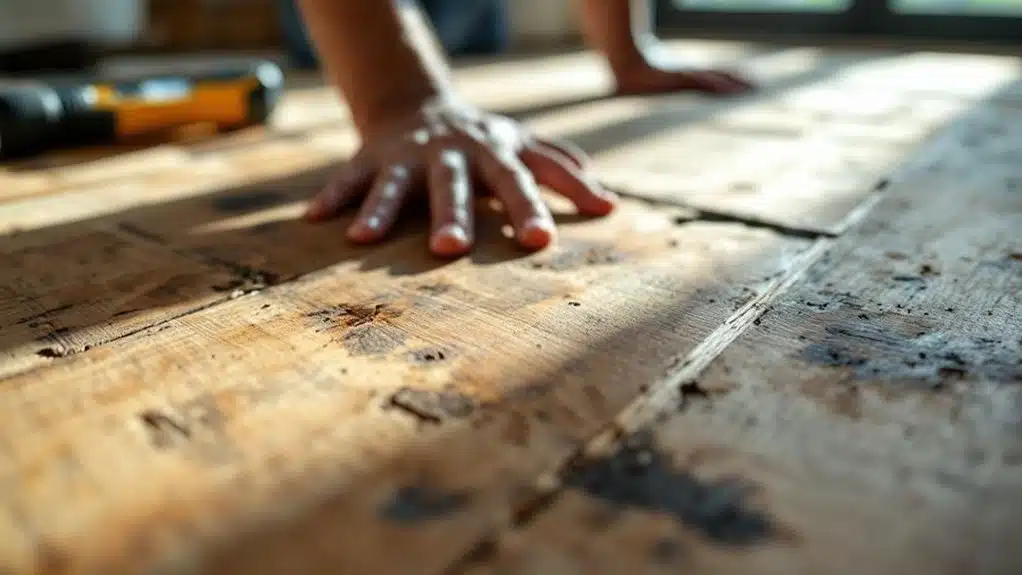
Knowing where to look alters a guesswork walk-through into a reliable diagnostic process. Start by gathering your inspection tools: a flashlight, moisture meter, screwdriver, and a straight edge. Access crawl spaces or basements to visually examine subfloor materials from below, checking for discoloration, rot, or fastener failure. Above the surface, walk slowly across every section, applying firm pressure near walls, changes, and load-bearing points. You’re listening for squeaks caused by loose fasteners and feeling for deflection that signals moisture damage or structural compromise. Use your screwdriver to probe suspicious areas — healthy subfloor materials resist penetration, while compromised wood yields easily. Document each problem location precisely before purchasing replacement materials. After inspection, ensure your subfloor maintains ideal humidity levels between 35% and 55% to prevent future wood expansion or contraction. Systematic inspection eliminates surprises and guarantees your new flooring installation rests on a structurally sound foundation.
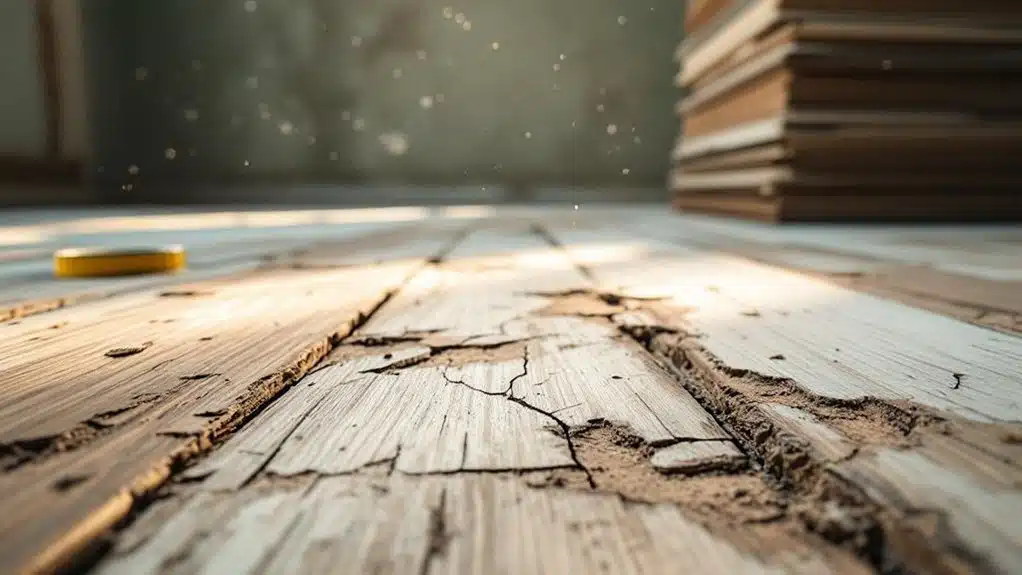
What Moisture Does to Your Subfloor (and Why It Spreads Fast)
Moisture is the single most destructive force acting on subfloor materials, and what your inspection reveals about discoloration, soft spots, or fastener failure almost always traces back to it. Moisture effects compound quickly as wood absorbs water, swells, and weakens structural integrity before surface damage becomes visible. Once rot begins, it spreads to adjacent panels and framing. In humid climates like Georgia, selecting waterproof flooring options during installation can provide an additional protective barrier against moisture damage.
Watch for these critical moisture indicators:
- Cupped or buckled panels signal prolonged exposure from below
- Dark staining or mold growth confirms active or historic water intrusion
- Loose fasteners indicate repeated swelling cycles that compromise hold
Your prevention tips should include controlling humidity, sealing penetrations, and correcting drainage issues before installation. Addressing moisture at the source protects both your subfloor and the clients depending on your work.
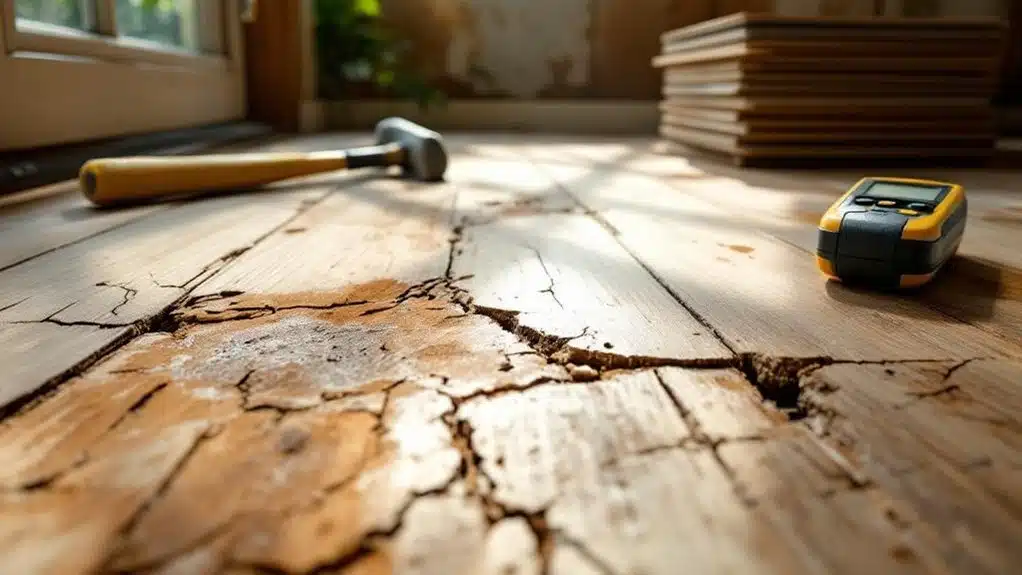
Why New Flooring Makes Subfloor Problems Worse
Installing new flooring over a damaged subfloor doesn’t fix the problem—it hides it. When you skip a proper subfloor assessment, you’re fundamentally sealing moisture, rot, and structural weakness beneath a finished surface. The new flooring then traps humidity, accelerating decay you can no longer see.
The flooring installation consequences are significant. Hardwood buckles. Tile grout cracks. Luxury vinyl develops soft spots. These failures don’t just ruin the new materials—they force a complete tear-out, costing far more than if you’d addressed the subfloor first.
For professionals serving clients, this matters deeply. Recommending installation over a compromised subfloor damages trust and creates liability. Always inspect, probe, and confirm subfloor integrity before any installation begins. A compromised foundation undermines long-term durability and diminishes the home value your clients are trying to protect. Your clients deserve a foundation that endures.
Subfloor Damage: DIY Fix or Call a Pro?
Once you’ve identified subfloor damage, you’ll need to decide whether to tackle the repair yourself or bring in a professional. Small-scale issues—like a single soft spot caused by minor moisture damage or a few squeaky boards—are typically within reach for a skilled DIYer with basic carpentry tools. Nevertheless, if you’re dealing with widespread rot, structural compromise, or damage that extends beneath load-bearing walls, you should call a licensed contractor before the problem escalates further. Similar to how water damage can necessitate floor replacement rather than refinishing, subfloor water damage often requires professional assessment to determine the extent of structural integrity compromise.
Assessing DIY Feasibility
After identifying subfloor damage, you’ll need to determine whether it’s a project you can tackle yourself or one that requires a professional. Evaluating DIY feasibility depends on your familiarity with subfloor materials and repair techniques, plus the damage’s scope.
Consider these key factors before proceeding:
- Damage extent: Minor rot or small soft spots are manageable DIY repairs, while widespread structural damage demands professional intervention.
- Subfloor materials: Plywood and OSB respond differently to repair techniques, requiring material-specific knowledge for effective results.
- Tool availability: Proper cutting, fastening, and leveling tools are vital for executing repairs correctly.
Honestly gauging your skill level protects both the people living in the space and your investment. Underestimating a repair’s complexity can compromise structural integrity and lead to costlier corrections later.
When To Hire Professionals
Knowing your limits is just as important as knowing the damage. Certain subfloor conditions demand professional intervention, regardless of your skill level. Call a licensed contractor when you encounter structural joist damage, widespread moisture intrusion, or subfloor materials compromised across multiple rooms. Professionals bring specialized repair techniques, proper equipment, and code compliance knowledge that protect both your clients and your investment.
Hire a pro when damage affects load-bearing areas, when mold remediation is required before repairs, or when the subfloor spans complex passages between rooms. Attempting advanced repairs without proper training risks worsening structural integrity and creating liability. A qualified contractor accurately diagnoses hidden damage, selects appropriate subfloor materials, and executes repair techniques that meet building standards—ensuring the finished flooring installation performs safely and correctly long-term.
What Subfloor Repairs Actually Cost (Based on Damage Type)
Subfloor repair costs vary widely depending on the type and extent of damage, so understanding the price ranges for each damage category helps you budget accurately before work begins. Knowing common repair costs by damage types lets you communicate clearly with contractors and avoid surprise expenses.
- Minor squeaks or loose panels: $100–$300, typically involving fastener replacement or reinforcement
- Water damage or rot: $500–$2,500, requiring partial or full panel replacement depending on spread
- Structural compromise from pests or long-term neglect: $2,000–$7,000+, often involving joist repairs alongside subfloor replacement
Always get itemized estimates from at least two licensed contractors. Comparing breakdowns helps you identify inflated labor charges and guarantees the scope of work matches your home’s actual needs.
Frequently Asked Questions
Can I Install New Flooring Over a Slightly Uneven Subfloor?
You shouldn’t install new flooring over an uneven subfloor without addressing it first. Use subfloor inspection tips to identify high and low spots, then apply uneven flooring solutions like self-leveling compound before proceeding with installation.
How Long Does a Typical Subfloor Repair Actually Take to Complete?
Your repair process typically takes one to three days. For a time estimate, you’ll spend four to eight hours on small patches, while full subfloor replacements demand additional drying and curing time before you can proceed.
Does Subfloor Damage Affect My Home’s Resale Value Significantly?
Like a cracked foundation in your reputation, subfloor damage indicators greatly hurt your resale impact. You’ll face lower offers, failed inspections, and buyer hesitation. Addressing damage proactively protects your investment and serves future homeowners well.
What Subfloor Thickness Is Required for Different Flooring Material Types?
You’ll need ¾” subfloor materials for hardwood, ½” for tile with added cement board, and ⅝” for laminate. Always verify flooring compatibility requirements—manufacturers specify minimum thicknesses to guarantee structural integrity and prevent premature failure.
Are Certain Subfloor Materials More Resistant to Future Damage Than Others?
Yes, certain subfloor types offer superior durability. You’ll find that pressure-treated plywood provides excellent moisture resistance. Prioritize proper installation techniques to maximize longevity, and weigh cost considerations carefully—concrete backer board’s upfront expense often prevents expensive future repairs.
Conclusion
Your subfloor is the unsung foundation beneath every step you take. Before laying new flooring, you’ve got to address what’s underneath — soft spots, moisture intrusion, and structural fatigue don’t resolve themselves. Ignoring these conditions simply delays a more significant conversation with your wallet. Whether you’re tackling repairs yourself or bringing in a professional, acting decisively now prevents a minor structural inconvenience from becoming a full-scale remediation project. Your floors are only as reliable as what’s supporting them.