What Is a Subfloor and Why Does It Matter Before Any Flooring Goes Down?
Your subfloor is the structural layer sitting directly above your floor joists, and it carries every load your finished floor will ever face. It distributes weight, stabilizes surface materials, and determines whether your floor stays flat and quiet for decades. Common materials include plywood, OSB, and concrete — each with distinct performance characteristics. If it’s damaged, uneven, or moisture-compromised, no finished floor will perform correctly above it. Everything you need to assess and fix it is covered ahead.
Key Takeaways
- A subfloor is the structural layer above floor joists that distributes weight from furniture, appliances, and foot traffic throughout the floor assembly.
- Common subfloor materials include plywood, OSB, and concrete, each with distinct properties affecting moisture resistance and flooring compatibility.
- The subfloor forms the base of a multi-layer assembly including underlayment and finished flooring, where any compromised layer weakens the entire structure.
- Poor subfloor conditions cause squeaking, warping, and flooring failure, making inspection and repair essential before any finished flooring installation begins.
- Moisture is the leading threat to subfloors, causing damage within 24–48 hours, making early detection and humidity control critically important.
What a Subfloor Actually Is

A subfloor is the structural layer of flooring that sits directly on top of your home’s floor joists, acting as the foundation for every finished floor surface above it. It bears the weight of everything above it — furniture, appliances, and foot traffic — while distributing that load evenly across the joists below.
Common subfloor materials include plywood, oriented strand board (OSB), and concrete. Each material offers different load-bearing capacities and moisture resistance levels, so your choice depends on the environment and intended finished floor.
Subfloor insulation is sometimes integrated beneath or between joists to improve thermal and acoustic performance, particularly in homes with crawl spaces or unconditioned areas below. Without a properly installed subfloor, your finished flooring lacks the rigid, stable base it needs to perform correctly.
For homeowners in Middle Georgia looking to ensure their subfloor installation meets professional standards, consulting with specialty flooring experts can help you select the right materials and installation approach for your specific climate and home construction.
The Layers Between Your Joists and Your Finished Floor
Understanding the full floor assembly means recognizing that several distinct layers sit between your joists and your finished floor, each serving a specific structural or functional purpose. Subfloor importance becomes clear when you see how each layer contributes to structural stability.
| Layer | Primary Function |
|---|---|
| Subfloor | Load distribution |
| Underlayment | Cushion and moisture control |
| Finished Floor | Surface performance |
Your subfloor anchors directly to the joists, transferring weight loads downward efficiently. The underlayment then addresses surface irregularities and moisture concerns before your finished flooring installs. Skipping or compromising any layer weakens the entire assembly. When you’re helping clients select flooring systems, understanding these distinctions guarantees you’re recommending solutions that perform correctly long-term rather than creating callbacks and costly repairs later. Proper humidity level maintenance between 45% and 65% protects your subfloor and underlayment from wood shrinkage and expansion that can compromise the integrity of the entire floor assembly.
Plywood, OSB, or Concrete : Which Subfloor Do You Have?
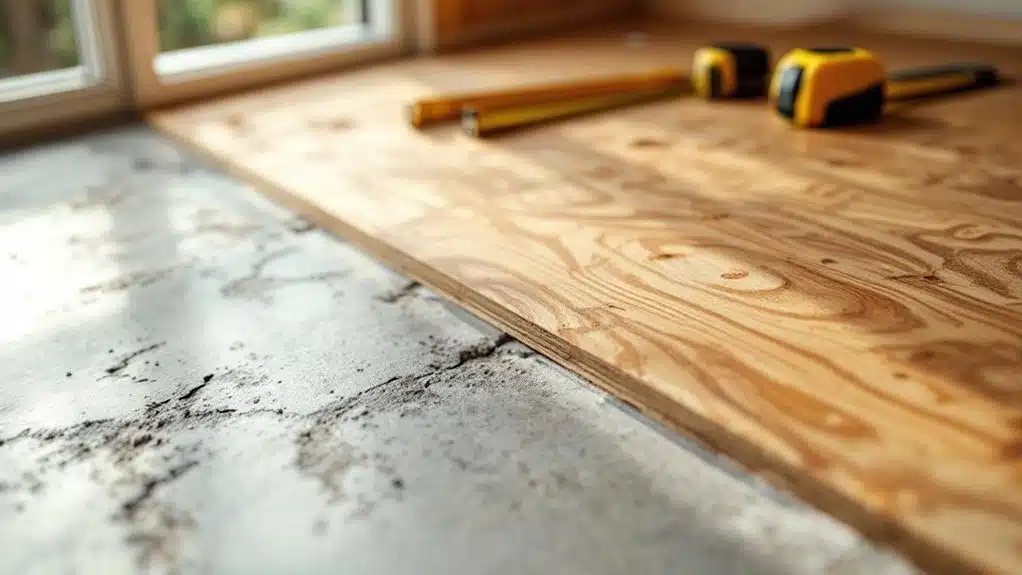
Identifying your subfloor material determines which flooring products you can install, how you’ll prepare the surface, and what fastening or adhesive systems you’ll use. Plywood benefits include dimensional stability, nail-holding strength, and compatibility with moisture-sensitive hardwoods. OSB offers a cost-effective alternative but absorbs moisture more readily at its edges, requiring careful sealing. Concrete durability makes it ideal for below-grade and slab-on-grade applications, but its hardness and potential moisture vapor transmission demand specific adhesives, moisture barriers, or floating installation methods. To identify your subfloor, expose a small section near a vent or threshold. Plywood shows visible wood grain layers; OSB displays compressed wood strands; concrete appears solid gray. Knowing your subfloor type before recommending or installing any finished flooring protects both the installation and the people relying on it. Professional installation services can guide you through the selection and preparation process to ensure your chosen flooring material performs optimally on your specific subfloor type.
Why a Bad Subfloor Causes Squeaks, Gaps, and Buckling
When moisture infiltrates your subfloor, it causes plywood and OSB panels to warp, swell, and lose structural integrity, creating an uneven base that compromises every flooring layer above it. Once boards pull away from their fasteners or shift out of position, you’ll hear the telltale squeaking that signals a failing subfloor system. Catching these warning signs early prevents the costly cycle of buckling, gapping, and surface floor damage that follows unchecked subfloor deterioration. In humid climates like Georgia, choosing waterproof flooring options above a compromised subfloor provides an added layer of protection against moisture damage and mold growth.
Moisture Warps Subfloor Panels
Moisture is the subfloor’s worst enemy, and it doesn’t need much to cause serious structural damage. Without proper vapor barriers and water barriers, panels absorb humidity, swell, and warp, destroying flooring compatibility above. Maintaining slip-resistant features and proper drainage in high-traffic areas further protects your subfloor investment from moisture-related damage.
| Moisture Issue | Cause | Solution |
|---|---|---|
| Panel swelling | High humidity | Humidity control systems |
| Edge buckling | Poor drainage solutions | Install proper drainage solutions |
| Soft spots | Water infiltration | Apply vapor barriers |
| Delamination | Trapped condensation | Subfloor insulation upgrades |
| Surface mold | Failed installation techniques | Moisture detection protocols |
You must address moisture before installation begins. Use moisture detection tools to assess subfloor conditions, implement subfloor insulation beneath panels, and apply vapor barriers consistently. Correct installation techniques seal vulnerable edges, preventing long-term warping that compromises every flooring layer above.
Loose Boards Create Squeaks
Squeaks, gaps, and buckling don’t appear randomly — they signal a subfloor that’s failing beneath your feet. When fasteners loosen over time, subfloor panels shift against joists with every step, creating the friction that produces squeaky floors. That movement likewise separates panel edges, opening gaps that destabilize your finished flooring above. Once the structural connection between subfloor and joist weakens, your entire floor assembly loses its rigidity.
These failures directly threaten flooring longevity. Tile grout cracks under flex, hardwood joints separate, and luxury vinyl loses adhesion where panels move. You can address minor squeaks by driving screws through the subfloor into the joist below, eliminating movement at the source. Catching these issues before installing new flooring prevents premature failure and protects your investment long-term. Regular inspection of your subfloor during seasonal checks allows you to identify and repair damage before it compromises your finished floors.
Signs You Need to Fix the Subfloor Before Installing Anything

Before installing any new flooring, you need to identify whether your subfloor requires repairs, as laying materials over a compromised base will only accelerate deterioration and void most manufacturer warranties. Applying proper subfloor inspection tips helps you catch problems early and choose appropriate repair techniques before they escalate. Identifying subfloor issues before installation is especially critical since water damage can prevent restoration options and may necessitate complete flooring replacement rather than refinishing.
Watch for these warning signs:
- Soft or spongy spots indicate moisture damage or rot beneath the surface
- Visible warping or buckling signals water infiltration or structural failure
- Persistent squeaks suggest loose fasteners or delaminated panels
- Uneven or sloping areas exceeding 3/16 inch over 10 feet will compromise floating floor installations
- Mold or musty odors confirm active moisture intrusion requiring immediate remediation
Addressing these conditions before installation protects your investment, guarantees flooring longevity, and maintains the structural integrity your clients depend on.
Subfloor Moisture Problems and Why They Wreck Floors Fast
Moisture reaching your subfloor can come from multiple sources, including ground vapor pushing through a crawl space, plumbing leaks, and condensation from temperature differentials between living spaces and uninsulated floor assemblies. Once moisture penetrates the subfloor, it triggers rapid wood fiber breakdown, causes OSB to swell and delaminate, and creates conditions where mold colonies establish within 24 to 48 hours. You can lose structural integrity in a subfloor panel far faster than most homeowners expect, often before any surface-level warning signs appear in the finished flooring above. Installing waterproof membranes beneath flooring systems prevents water damage and the accelerated deterioration that compromises structural integrity and creates environments for mold growth.
Moisture Sources Beneath Floors
Water is the subfloor’s worst enemy, and it doesn’t need to come from a burst pipe to cause serious structural damage. Moisture infiltrates from multiple directions simultaneously, making early identification critical for anyone responsible for a building’s structural integrity.
Common moisture sources beneath floors include:
- Ground vapor rising through concrete slabs or crawl spaces without proper moisture barriers installed
- Condensation forming when warm indoor air contacts cooler subfloor surfaces, particularly in homes lacking adequate humidity control
- Plumbing leaks from slow drips inside walls or beneath fixtures that go undetected for months
You’ll rarely see this moisture directly. Instead, it silently deteriorates wood fibers, promotes mold colonization, and compromises fastener integrity. Implementing proper drainage systems during initial construction prevents water intrusion points that would otherwise compromise the subfloor’s structural integrity. Addressing each source individually before installation protects the clients and communities you serve.
Damage Moisture Causes Quickly
Once moisture infiltrates a subfloor, it moves fast and leaves little margin for delayed action. Without early moisture detection, structural degradation accelerates across every layer above it.
| Timeframe | Damage Type | Urgency |
|---|---|---|
| 24–48 hours | Swelling, warping | Immediate |
| 3–7 days | Mold colonization | Critical |
| 2–4 weeks | Structural rot | Emergency |
Each stage demands different repair techniques. Early swelling responds to drying and targeted replacement. Mold requires remediation before any repair techniques address structural components. Advanced rot demands full subfloor section removal. Maintaining ideal humidity levels between 35% and 55% helps prevent moisture infiltration before it becomes a structural emergency.
You’re protecting the people who’ll walk on these floors daily. Delaying moisture detection by even a few days forces costlier, more invasive repair techniques later. Act at the first sign—discoloration, soft spots, or unexplained odor.
How to Check If Your Subfloor Is Level and Structurally Sound
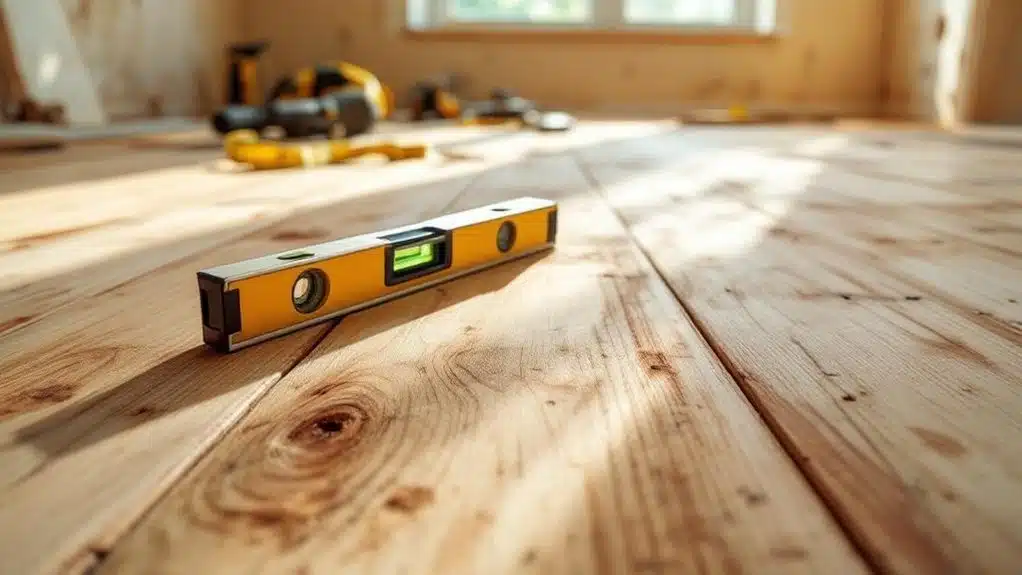
Before installing any flooring material, you’ll need to confirm that your subfloor is both level and structurally sound. Use these subfloor inspection techniques and leveling tools to assess conditions accurately:
- Straightedge test: Drag a 6-foot straightedge across the surface, marking any gaps exceeding 3/16 inch per 10 feet.
- Deflection check: Walk the subfloor slowly, noting any bounce, flex, or movement that signals weakened joists or loose fasteners.
- Moisture meter reading: Scan multiple zones for moisture content, keeping readings below 12% before proceeding.
After identifying problem areas, address low spots with floor-leveling compound and secure loose panels with ring-shank nails or screws. Skipping these steps transfers every flaw directly into your finished floor, shortening its lifespan and disappointing the clients you’re serving.
When to Repair the Subfloor vs. Replace It Entirely
Deciding whether to repair or replace your subfloor comes down to the extent of damage, the affected surface area, and the structural integrity of the underlying joists. If damage covers less than 30% of a panel and the joists remain sound, targeted repair techniques—like sistering joists, patching with matching-thickness plywood, or injecting epoxy consolidants—are often sufficient. On the other hand, when rot, mold, or structural failure spans multiple panels or compromises joist integrity, full replacement becomes necessary. Replacement costs vary greatly based on panel size, subfloor material, and labor rates, so getting multiple contractor quotes helps you make a financially responsible decision. Always prioritize structural soundness over surface appearance—a properly restored subfloor protects both your flooring investment and the safety of everyone depending on that space.
How Subfloor Requirements Change Based on What You’re Installing
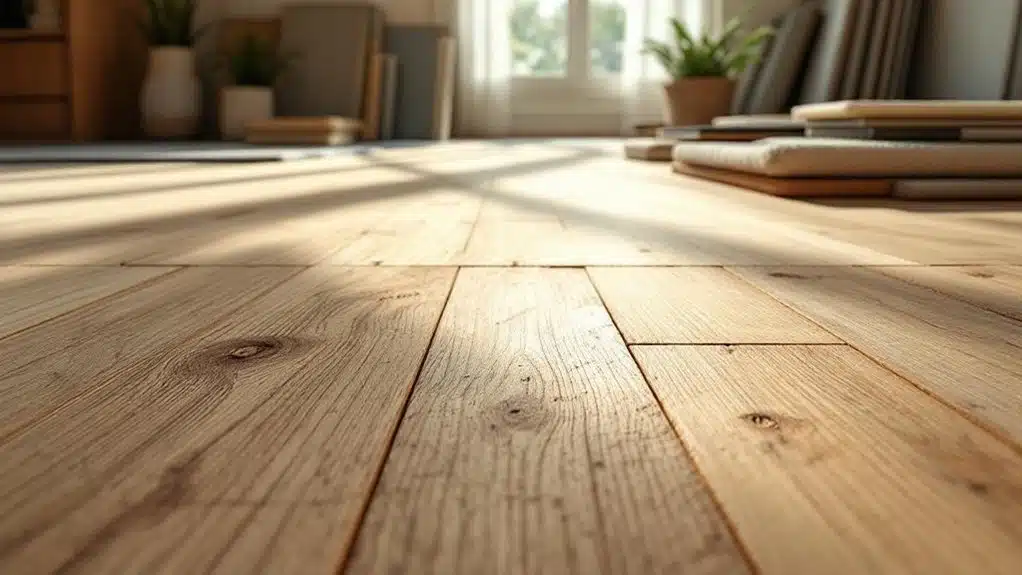
Whether you’re repairing a damaged section or replacing panels outright, the finished subfloor must meet the specific performance demands of whatever flooring goes on top.
Different materials impose distinct structural and environmental requirements:
- Tile and stone demand a deflection-free, rigid base—typically thicker plywood or cement board—to prevent cracking grout lines.
- Hardwood and engineered wood require controlled moisture levels, making subfloor insulation and proper subfloor ventilation critical for preventing warping and expansion gaps.
- Luxury vinyl and laminate need a flat, smooth surface within 3/16 inch over 10 feet, with no high spots or voids underneath.
Neglecting these specifications compromises both the flooring’s longevity and the clients you’re serving. Always verify manufacturer tolerances before finalizing your subfloor preparation approach.
Frequently Asked Questions
Can I Install a Subfloor Directly Over an Existing Damaged One?
You can’t install over a damaged subfloor without risking structural failure. You’ll need to assess subfloor types, repair rot or weakness first, then apply proper installation methods to guarantee a stable, long-lasting foundation beneath your flooring.
How Thick Should a Subfloor Be for Heavy Furniture or Appliances?
Over 60% of floor failures stem from inadequate thickness. For heavy furniture or appliances, you’ll want subfloor materials at least ¾-inch thick. Adding subfloor insulation beneath reinforces stability, ensuring you’re protecting those who depend on durable, safe flooring.
Does Subfloor Quality Affect Home Resale Value or Inspection Results?
Yes, subfloor materials and structural integrity directly impact your home’s resale value and inspection results. Inspectors’ll flag damaged or inadequate subfloors, potentially reducing your home’s value and deterring buyers who prioritize safe, well-maintained living environments.
What Fasteners Are Best for Securing a Subfloor to Floor Joists?
Use ring-shank nails or coarse-thread screws to secure your subfloor materials to floor joists. These fastener types resist pull-out and prevent squeaking, ensuring you’ll provide clients with a stable, long-lasting foundation they can confidently depend on.
How Long Does a Properly Installed Subfloor Typically Last?
moisture control determines everything. You’ve got to maintain it consistently, or you’ll compromise your entire flooring system prematurely.
Conclusion
Your subfloor is the unsung foundation everything else depends on. Like Odysseus building his marriage bed directly into a living olive tree, your finished floor is only as permanent as what anchors it below. Skip the subfloor assessment, and you’re installing on borrowed time. Check moisture levels, verify flatness, confirm structural integrity, and address every defect before the first plank drops. What’s underneath determines everything that survives above it.